Using MDX with NextJS
Using Next-MDX-Remote with NextJS to write MDX blogs
Published on 15 Feb, 2022 · 10 min read · 0 reading right now · 1 views

NextJS & MDX
Introduction
MDX is a markdown extension that brings in support for JS components(typically react components, but not only limited to) inside markdown.
To know more about MDX, checkout the official MDX docs here .
Here's what I did inorder to use MDX with NextJS.
Goal
My main goal was to:
-
Get MDX working.
-
Integrate remark/rehype plugins for syntax highlighting, heading links, generating slugs, etc.
-
Using custom react components inside my blogs.
-
Sourcing contents from different directory. All my blogs are in a
posts/directory, so I want this directory to be the source.
Using MDX with NextJS
The idea of using MDX in my blogs came from this article by Josh W Comeau . I wanted more control over how certain elements of my blogs will be show, as well as using custom react components inside my blogs.
As it turns out, there are multiple libraries that allows us to use MDX with NextJS. Some of them are(based on popularity/usage):
-
@next/mdx -
mdx-bundler -
next-mdx-enhanced(deprecated, maintainers now recommendnext-mdx-remote) -
next-mdx-remote
This article compares these libraries pretty well.
I was pretty confused as to which library should I go with. After having some problems with
@next/mdx
, I went ahead with
next-mdx-remote
, which turned out to be a pretty good choice.
The problems I faced with @next/mdx
At first, I was not sure which library to go with. So, I started with
@next/mdx
, but some things went wrong 👇
Trying
@next/mdx
I followed
this official guide
to setup MDX. In order to use MDX with NextJS, I have to modify the NextJS config file
next.config.js
.
First, install the library
npm i @next/mdx
Then modify
next.config.js
as below.
const withMDX = require("@next/mdx")();
module.exports = withMDX();

// OR

const withMDX = require("@next/mdx")({
  extension: /\.(md|mdx)$/,
});

module.exports = withMDX({
  pageExtensions: ["js", "jsx", "md", "mdx", "ts", "tsx"],
});
After making these changes, I went ahead and made a
.mdx
file inside the
/pages
directory. And it worked!
The problem
As I said in one of my goals, I use
remark
/
rehype
plugins in order to have syntax highlighting, heading links, generating slugs, etc. And these remark plugins are ESM only(i.e. they use
import
instead of
require
), and I couldn't use
import
statements inside
next.config.js
.
However, I did manage to workaround this problem by having
"type": "module"
in
package.json
and rename
next.config.js
to
next.config.mjs
.
Now my
next.config.mjs
looks like this:
import rehypeSlug from "rehype-slug";
import remarkToc from "remark-toc";
import NextMdx from "@next/mdx";

const withMDX = NextMdx({
  extension: /\.(md|mdx)$/,
  options: {
    remarkPlugins: [remarkToc],
    rehypePlugins: [rehypeSlug],
  },
});

export default withMDX({
  pageExtensions: ["js", "jsx", "md", "mdx", "ts", "tsx"],
});
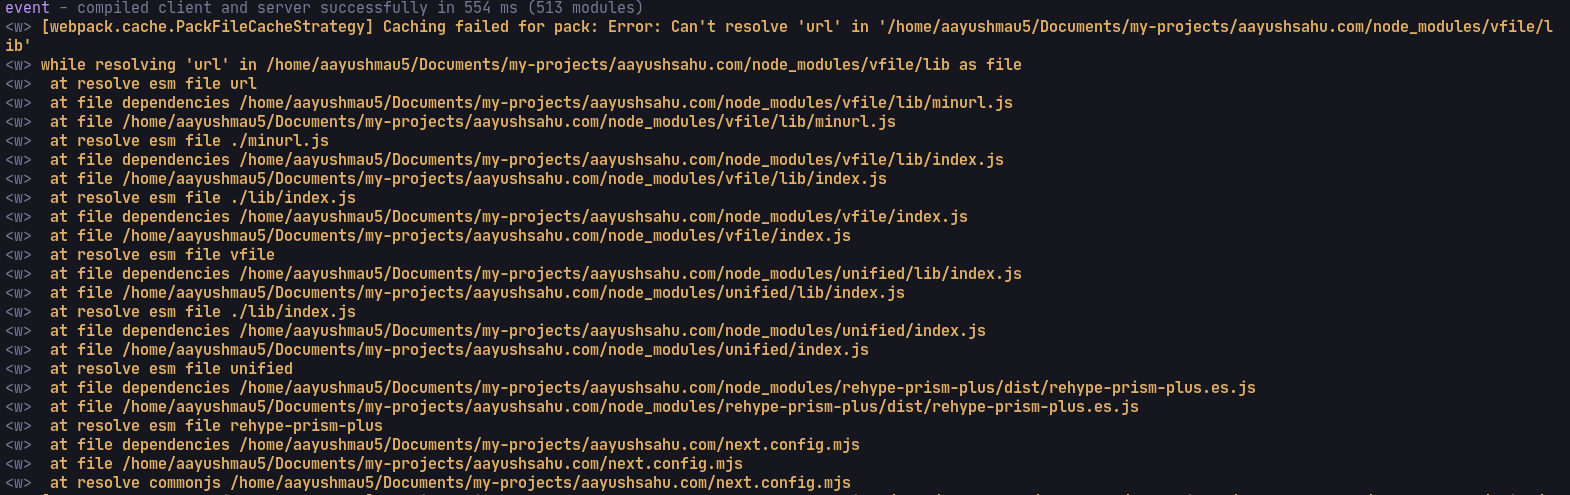
Though this didn't help because I started getting webpack warnings with these plugins, and some plugins refused to work. The internet didn't help 😞
And with that, my journey with
@next/mdx
ended.
Using
next-mdx-remote
Let's get started with integrating
next-mdx-remote
.
Directory Structure
Here's how my directories look like:
posts/
├── blog1.mdx
└── blog2.mdx
pages/
├── blog/
│   ├── index.js
│   └── [slug].js
└── index.js
utils/
└── getPostData.js
As I said earlier, the
posts/
directory contains all my
mdx
blogs, and
utils/getPostData.js
contains some utility functions. We will see what those utility functions are, later.
pages/blog/index.js
points to
/blog
route &
pages/blog/[slug].js
is a dynamic route which will point to anything that comes after
/blog
, for example,
/blog/something
. This is how NextJS routing works. The point being,
/blog
route will have the index of all blogs, and the dynamic route will point to a specific blog(identified by the
slug
) which will be the MDX blog.
Steps
Install the following packages
npm i next-mdx-remote gray-matter
One thing to note about
next-mdx-remote
is that it doesn't care about where your data comes from, all it needs is that you provide the data. Like I said earlier, all my MDX blogs are inside a
posts/
directory, so I need to perform some kind of operation in order to provide
next-mdx-remote
my MDX blogs data from
posts/
directory.
We will create some utility functions that will:
-
get all the sorted posts data(like the contents, and frontmatter). This will be used in
/blogroute to index all the blogs. -
get all the post id(aka
slug). -
get post contents corresponding to their
slug.
We will read all the mdx files from
posts/
directory, and parse their frontmatter using the
gray-matter library
.
Here's the code:
import fs from "fs";
import path from "path";
import matter from "gray-matter";

const postsDirectory = path.join(process.cwd(), "posts"); // the posts/ directory path
const fileNames = fs.readdirSync(postsDirectory); // all the mdx files inside the posts/ directory

// sorted post data
export function getSortedPostsData() {
  const allPostsData = fileNames.map((fileName) => {
    const slug = fileName.replace(/\.mdx$/, ""); // remove the .mdx extension from file names

    const fullPath = path.join(postsDirectory, fileName);
    const fileContents = fs.readFileSync(fullPath, "utf-8"); // read the file contents

    const { data: frontMatter } = matter(fileContents); // get the frontmatter

    return {
      slug,
      ...frontMatter,
    };
  });

  // sort the posts
  return allPostsData.sort((a, b) => {
    if (a.date < b.date) {
      return 1;
    } else {
      return -1;
    }
  });
}

// all post ids(or slug)
export function getAllPostIds() {
  const fileNames = fs.readdirSync(postsDirectory);
  return fileNames.map((fileName) => ({
    params: {
      slug: fileName.replace(/\.mdx$/, ""),
    },
  }));
}

// a particular post data
export async function getPostData(slug) {
  const fullPath = path.join(postsDirectory, `${slug}.mdx`); // get the full path of a post
  const fileContents = fs.readFileSync(fullPath, "utf-8"); // read the post contents

  const matterResult = matter(fileContents);

  return {
    slug,
    content: matterResult.content, // the file contents without the frontmatter
    frontmatter: matterResult.data, // the frontmatter
  };
}
After this, first we will index all the blogs inside
/blogs
route. Put the following code in
pages/blog/index.js
file.
import { getSortedPostsData } from "utils/getPostData";

export default function Blogs({ posts }) {
  // maps through the blog posts and renders them as a list
  return (
    <div>
      {posts.map((post, index) => (
        <Link key={index} href={`/blog/${post.slug}`}>
          <a>{post.title}</a>
        </Link>
      ))}
    </div>
  );
}

export const getStaticProps = () => {
  const posts = getSortedPostsData(); // get all the sorted posts data

  return {
    props: {
      // pass it to the component through props
      posts,
    },
  };
};
We are using the
getSortedPostsData
utility function to get all the sorted posts, and then rendering it on the page. That's it.
One cool thing about this is, we are statically generating the data using
getStaticProps
, meaning all the pages will be generated at built time. More info about
getStaticProps
here
.
Now that we have an index page, users can click on any of the link, and they will be directed to
/blog/<blog-slug>
route, which will be handled by our
/pages/blog/[slug].js
code.
Here's the code for that:
import { serialize } from "next-mdx-remote/serialize";
import { MDXRemote } from "next-mdx-remote";

import { getAllPostIds, getPostData } from "utils/getPosts";

export default function BlogPost({ source }) {
  // render the blog
  return (
    <div>
      <MDXRemote {...source} />
    </div>
  );
}

export const getStaticPaths = async () => {
  const paths = getAllPostIds(); // all the posts slug
  return {
    paths,
    fallback: false,
  };
};

export const getStaticProps = async ({ params }) => {
  const { content } = await getPostData(params.slug); // the post data in string
  const mdxSource = await serialize(content); // parse the MDX string
  return { props: { source: mdxSource } };
};
Let's start with
getStaticPaths
first. Using
getStaticPaths
we define a list of paths that we want to be statically generated. We are passing all the blog slugs so that our blogs can be statically generated.
Now, onto
getStaticProps
, the blog we want to access will be passed to the
slug
property in
params
object. Using that slug, we get the post data using
getPostData
utility function. This post data is just our MDX blog as a string.
We then pass the MDX string to
serialize
function which we are importing from
next-mdx-remote/serialize
. This function parses and compiles the provided MDX string and, returns a result which can be passed into a component to be rendered. The compiled MDX is then passed to our
BlogPost
component through the
props
(The return value from
getStaticProps
is passed to the rendering component).
Inside our
BlogPost
component, we are using the
MDXRemote
component imported from
next-mdx-remote
whose job is to render the compiled blog that we are getting from the props.
That's it. Start the nextjs dev server, and go to
/blog
, we will see the list of blogs. And on going to certain blog, we will see the rendered MDX blog.
Using remark/rehype plugins
Now that we have setup MDX, it's time to use Remark/Rehype plugins. These plugins is used to provide syntax highlighting, have autolinks in headings, generate table of contents, etc.
We will use
rehype-prism-plus
to provide syntax highlighting, and
remark-toc
to generate Table of Contents.
npm i rehype-prism-plus remark-toc
Since remark/rehype plugins only support ESM, we can use it inside our
/pages/blog/[slug].js
file(instead of using it inside
next.config.js
).
Here's the code:
import { serialize } from "next-mdx-remote/serialize";
import { MDXRemote } from "next-mdx-remote";

import rehypePrism from "rehype-prism-plus";
import remarkToc from "remark-toc";

import { getAllPostIds, getPostData } from "utils/getPosts";

export default function BlogPost({ source }) {
  // render the MDX blog
  return (
    <div>
      <MDXRemote {...source} />
    </div>
  );
}

export const getStaticPaths = async () => {
  const paths = getAllPostIds(); // all the posts slug
  return {
    paths,
    fallback: false,
  };
};

export const getStaticProps = async ({ params }) => {
  const { content } = await getPostData(params.slug); // the post data in string
  const mdxSource = await serialize(content, {
    mdxOptions: {
      rehypePlugins: [
        // passing rehype plugins(in an array)
        [rehypePrism, { showLineNumbers: true }], // to pass options to plugins, put the plugin in an array, and 2nd element should be the options object
      ],
      remarkPlugins: [remarkToc], // passing remark plugins
    },
  }); // parse the MDX string, now with pulgins
  return { props: { source: mdxSource } };
};
Everything remains the same except the part where we are parsing and compiling the MDX string. The
serialize
function takes a second parameter, which is a config object. In this config object, we are providing
mdxOptions
which is another object in which we pass remark and rehype plugins separately. One thing to know that is these plugins are used during the compilation of our MDX blog. That's why they are passed as options to the
serialize
function.
And with that, we should have our plugin working.
Using custom react components
One of MDX's prominent feature is it allows us to use React components inside our blogs, and it would be a shame if we didn't use this feature. So, let's use a React component inside our blog(for the sake of the length of this blog, the component will be a simple one). Here it is:
export default function ShowContentInside({ heading, children }) {
  return (
    <div>
      <h1>{heading}</h1>
      <div>{children}</div>
    </div>
  );
}
This component takes a
heading
prop, and a children to show the contents inside it.
Here's an example blog using the component(make sure to look at the syntax to see how to use components inside MDX).
---
title: "Using MDX with NextJS"
description: "How to use MDX with NextJS?"
---

Hello, world!

<ShowContentInside heading="this is a heading">

Show the contents inside it.

A valid markdown.

- This
- is a bullet point

</ShowContentInside>
This however won't work. How would our MDX document know where to get the
ShowContentInside
component?
For this, we need to pass our MDX renderer the
ShowContentInside
component(this behavior may differ in other MDX libraries in that you could import components inside your MDX document itself, but
next-mdx-remote
doesn't work like this).
// ...omitted

import ShowContentInside from "utils/ShowContentInside";

const component = {
  // react components to be passed to MDX renderer
  ShowContentInside,
};

export default function BlogPost({ source }) {
  // render the MDX blog(now with react components)
  return (
    <div>
      <MDXRemote {...source} components={components} />
    </div>
  );
}

// ...omitted
First we import our component, and then pass it to
MDXRemote
renderer component through
components
prop as an object. Now, during the rendering of our MDX blog, these components will be used inside our blogs.
Aaand we are done! 🥳
With that, we have seen:
-
how to use MDX using
next-mdx-remote -
how to use remark/rehype plugins with MDX
-
how to use react components with MDX
We have now a working blog page using MDX.
Concerns
These are some of the concerns I had when using
next-mdx-remote
.
Bundle size
When reading up about
next-mdx-remote
, I got to know that all the components are bundled during build time and it is available to every MDX file. Meaning even if some of our blog won't be using a certain component, it will still be available to them. Thus, users have to download those unnecessary components as well.
To overcome this issue, one can use dynamic importing. I found this thread which goes over this. Also, the example addresses this issue.
For me, I didn't find any drastic increase in bundle size, so I just did nothing 🤷.
Auto refresh on changes
One thing I missed while using
next-mdx-remote
is Hot Module Reload(HMR) which basically auto-refreshes your website whenever you make changes to files(in development mode).
However, I did find
next-remote-watch
which wasn't exactly equivalent to HMR, but it gets the job done. I just had to pass the directory(in this case my
posts/
directory) which I wanted to watch.
I did check NextJS' preview mode , but it didn't work because of a 2kb data limit, and required more involved work to setup.
A word about
mdx-bundler
I have seen some people recommend
mdx-bundler
. It seemed to have all the goodies to use MDX. And it is framework agnostic, so one can use it with other frameworks.
But right now,
next-mdx-remote
does the job for me, so I haven't dwelled much into
mdx-bundler
. But if anything comes up, I would love to give it a try.
There's no "the best" solution out there. Just use the one you feel like going with, and if you face any problems in the way, try to fix it or switch to other solution.
Other Resources
Some other resources to check out:
-
"Easily create a blog with Next.js, MDX, SSG and Syntax Highlighting" by Leigh Halliday , a YT video that sets up MDX using
next-mdx-remote. -
My website(the one you are reading this blog in) uses
next-mdx-remote, and the source code is Open-Source. Check out the code here .